The X-Plane CLI has been tested and works for: X-Plane 11 & 12
¶ Downloading & Required Plugin
First you will need to grab the latest release available for the LRM CLI:
- LRM CLI Client for X-Plane v6.0.1 (Linux x64)
- LRM CLI Client for X-Plane v6.0.1 (MacOS Apple Silicon)
You will also need to download the latest XPlaneConnect release candidate version. Please navigate to your version linked below.
Please note, the ARM Version is a fork of the software by NASA. We did not test the ARM version, community feedback is suggesting that it works. Use at your own risk.
Make sure to download the release candidate version. The newest non RC release is known to cause issues and frame-drops.
Version 6.0.1 of the LRM-CLI has been thoroughly tested with XPlaneConnect Version 1.3-rc.1 and 1.3-rc6.
It is recommended to stay with this version during the beta of the LRM-CLI. Please advise in your bug reports that you are using a different version of XplaneConnect, if you decide to act against this recommendation.
Once you have downloaded XPlaneConnect, you should copy the required plugin files from the extracted ZIP file to your X-Plane's Resources/plugins directory.
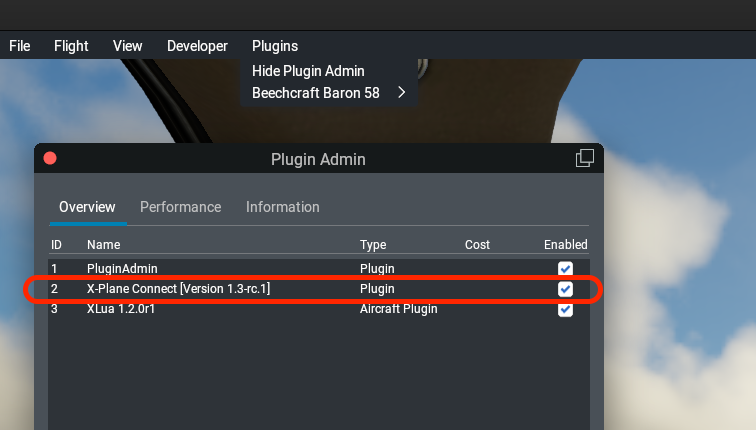
To confirm that the plugin is installed and enabled, navigate to the menu and verify that the plugin is shown and “enabled” is ticked as demonstrated below:


Verify that the “X-Plane Connect” plugin is shown in the list and a tick is in the “Enabled” column.
¶ Installing the Client - Linux
To install and run the LRM CLI Client you should first download the LRM CLI Client for Linux, and extract the two files which are as follows:
lrm-client- The main Linux Client binary fileclient.conf- The LRM CLI Client configuration file
You should now create a new directory called lrm-client in your Linux home directory (under the .config subdirectory). This directory is used by the LRM client to store it's configuration file client.conf. LRM will also generate and store a debug.log file in this directory and whilst we know that this does not adhere to the UNIX Filesystem Hierarchy Standard (FHS) scheme, we feel that this ensures that this keeps the installation process clean and installation and file locations across all other platforms remain the same.
Whilst you can do this manually using a file manager, assuming you extracted the files from the downloaded ZIP file, directly into your Downloads directory, you can open a terminal and run the following commands:
cd ~/Downloads
mkdir -p ~/.config/lrm-client
cp client.conf ~/.config/lrm-client/
Now we will simply copy the lrm-client binary file to a location in our $PATH, we, therefore, recommend you run the following command and accept the default “standard” location of /usr/share/bin as follows:
sudo cp lrm-client /usr/share/bin
sudo chmod +x /usr/share/bin/lrm-client
It is now recommended that you close the terminal window and re-open it (this is a fail-safe way to ensure that the lrm-client command is available for you to run)!
That's it! You can now follow the general configuration guide to configure the LRM CLI Client and start tracking your flights!
¶ Installing the Client - MacOS
To install and run the LRM CLI Client you should first download the LRM CLI Client for MacOS, and extract the two files which are as follows:
lrm-client- The main Linux Client binary fileclient.conf- The LRM CLI Client configuration file
You should now create a new directory called lrm-client in your Linux home directory (under the .config subdirectory). This directory is used by the LRM client to store it's configuration file client.conf. LRM will also generate and store a debug.log file in this directory and whilst we know that this does not adhere to the UNIX Filesystem Hierarchy Standard (FHS) scheme, we feel that this ensures that this keeps the installation process clean and installation and file locations across all other platforms remain the same.
Whilst you can do this manually using a file manager, assuming you extracted the files from the downloaded ZIP file, directly into your Downloads directory, you can open a terminal and run the following commands:
cd ~/Downloads
mkdir -p ~/.config/lrm-client
cp client.conf ~/.config/lrm-client/
Now we will simply copy the lrm-client binary file to a location in our $PATH, we, therefore, recommend you run the following command and accept the default “standard” location of /usr/share/bin as follows:
sudo cp lrm-client /usr/share/bin
sudo chmod +x /usr/share/bin/lrm-client
It is now recommended that you close the terminal window and re-open it (this is a fail-safe way to ensure that the lrm-client command is available for you to run)!
That's it! You can now follow the general configuration guide to configure the LRM CLI Client and start tracking your flights!
¶ Known Issues
As of version 6.0.1
- Upon landing the G-Force calculation ends up with an unrealistic value.
- The ToLiss A321 and A321Neo both show up as A321 in your flight report. Please refrain from sending in ICAO change requests in this particular matter. (We are currently speaking with ToLiss to get this fixed their side!)
¶ Troubleshooting
General Troubleshooting tips & information
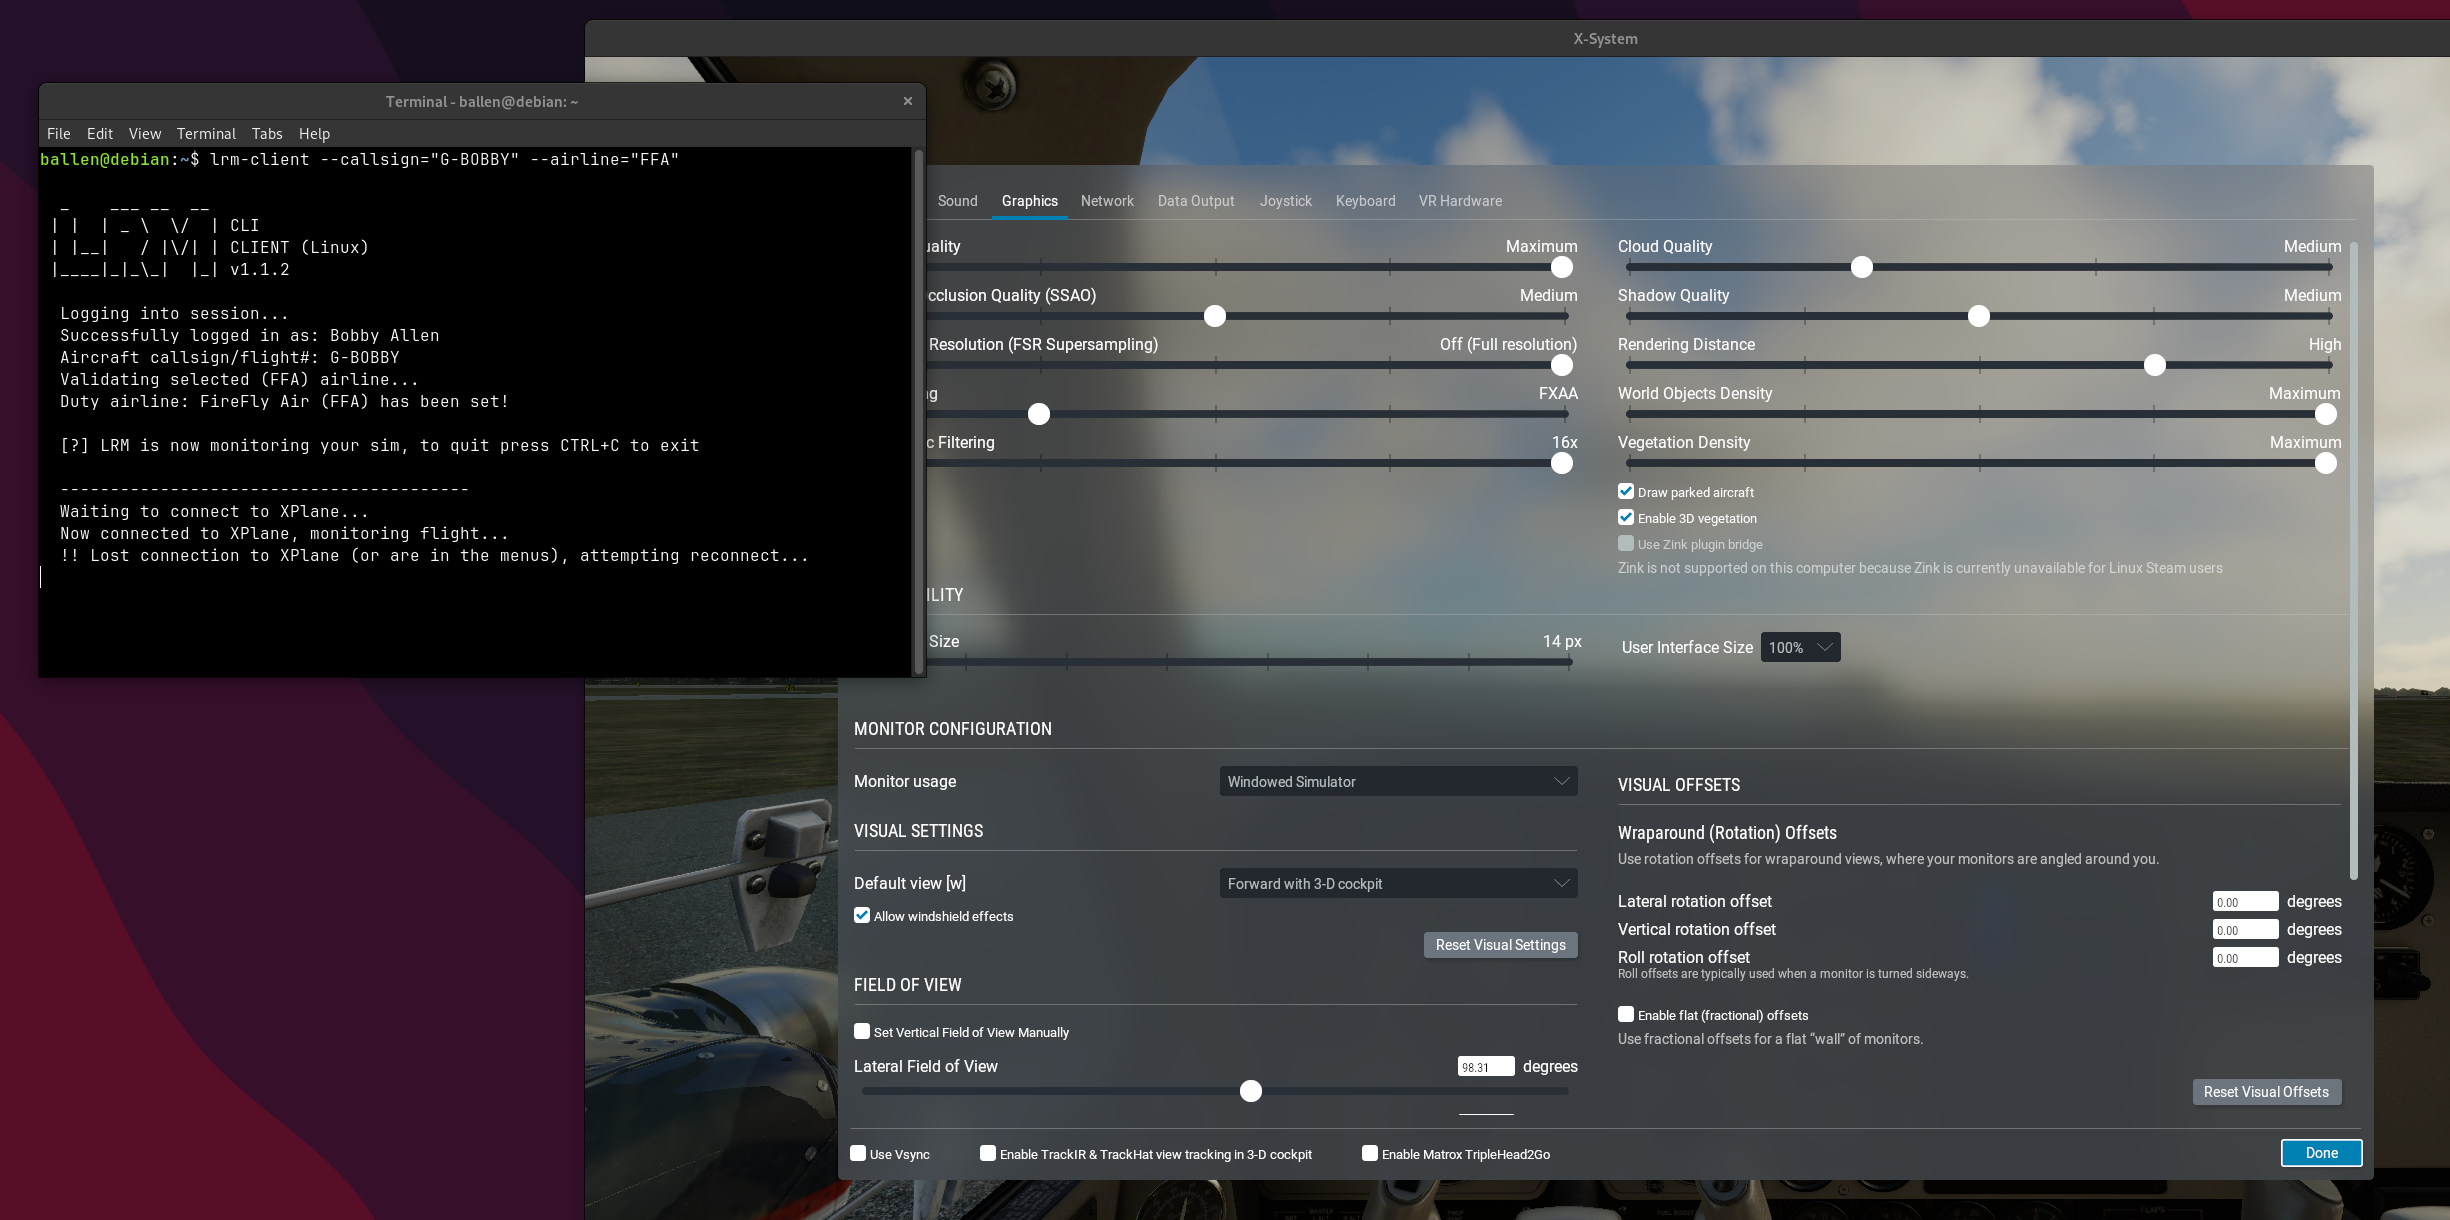
¶ I see a message saying “!! Lost connection to X-Plane (or in the menus), attempting to reconnect” - what gives?
This message will appear if you access the X-Plane menu system whilst you are in flight. Don't worry about it, it is simply there for information purposes only. Once you return to the main simulator, the LRM CLI client will automatically reconnect and there are no further actions you need to do!
