¶ Installing XPUIPC (for X-Plane Users)
¶ Downloading XPUIPC
This short tutorial will cover how to install and configure the XPUIPC plugin of which will enable the LRM Client to connect to and work with X-Plane.
If you haven’t already, the first step is to install X-Plane on your computer.
Once you have X-Plane installed (we officially support X-Plane 10, 11, and 12) you must then download the XPUIPC plugin (which is free of charge) from this URL: http://www.schiratti.com/xpuipc.html
¶ Installation
After you have set the static IP address in Windows, make a note of it (as we will need it shortly), the static IP address will be similar to 192.168.0.* or 192.168.1.* but depending on your network configuration could be any mix of numbers separated by dots.
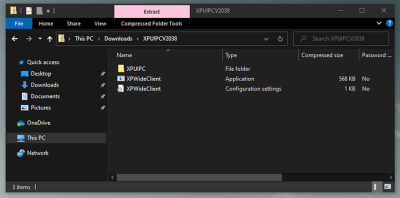
Once you have downloaded the ZIP file from the above link, double click it to open the contents, it should look as follows:
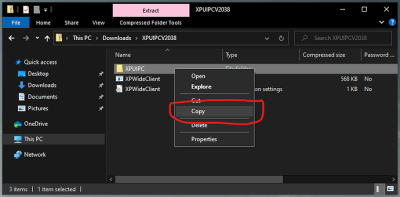
Right-click and choose Copy on the directory named XPUIPC as shown here:
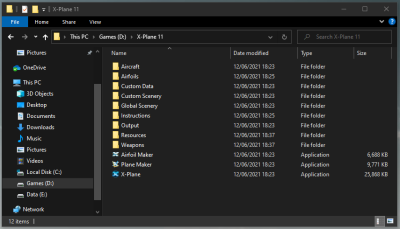
Let’s now navigate to the folder where X-Plane is installed on our PC (for me, this is D:\X-Plane 11), the folder should look appear as follows:
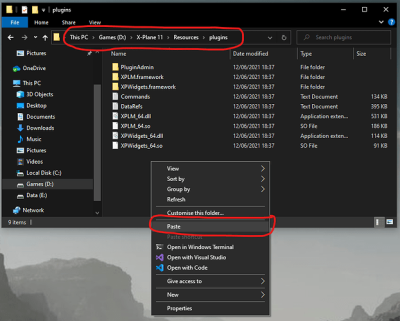
Now open up the Resources directory as shown in the above screenshot, once you are in the Resources directory, locate and double click on the plugins directory (to open the plugins directory) and then, right-click and choose Paste from the menu:
A new folder (named XPUIPC) should now appear like so:
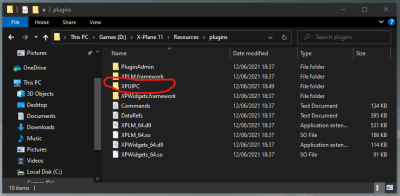
If you are using a setup with multiple Computers, make sure to assign a static IP address to your XPUIPC config. If you are using a single computer, feel free to jump to the "Run X-Plane" part of the documentation.
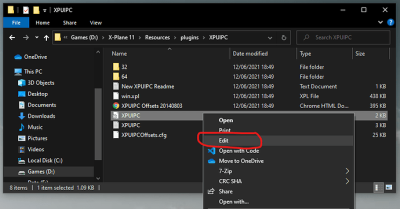
Open up the new XPUIPC directory and then right-click on the file named XPUIPC.INI and from the context menu click Edit:
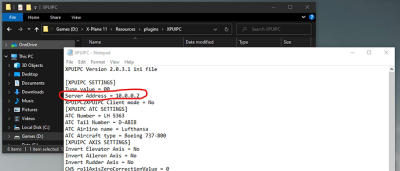
Notepad (or whatever program you have set to your default text editor) should now open and display the contents of the file, the ONLY setting we have to change in this file is to set our computer’s static IP address, the default IP address that is set in the file (10.0.0.2) should be changed now to match your static IP address as shown here:
Now we simply need to update the IP address with our own static IP address that you should have set at the start of this tutorial - for the sake of this tutorial, my static IP address is 192.168.1.201 (but you should replace this with whatever your IP address is)
So now, let’s change the IP address line in the file to match yours like so:
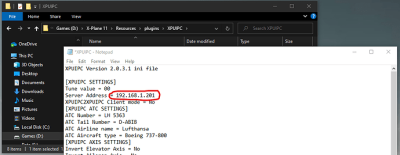
Now simply save the file!
¶ Run X-Plane
If you already have X-Plane open at this point, ensure that you close it and re-open it now...
Start a new flight in X-Plane and once you’re loaded into the simulator, you’re inside of the aircraft and are sitting on the runway (or at the gate etc)… open the LRM client - if all went to plan and you have successfully configured the XPUIPC plugin, the LRM client window should indicate that it is connected to the simulator successfully in the bottom left corner as per my screenshot below:
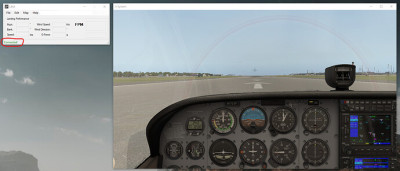
Please note that you can open the LRM client any time you wish, not just when your aircraft is on the runway or at the gate - LRM will automatically connect to it even if LRM client was opened BEFORE X-Plane or if you have enabled the “Blackbox mode” in the LRM client - the above instructions are just for this tutorial purposes!
Good job! - That’s all there is to it and you can now record your flights using and the LRM client (and FsHub if you choose to enable that option in the LRM Client).
If you have any issue using LRM client (and/or FsHub) with X-Plane 10, 11, or 12 please visit our Discord Server and a member of the team or community will help you get it sorted but please ensure that you tell us in your new post/topic the following information so we can diagnose your issue faster:
- The version of X-Plane you are using
- The version of the XPUIPC plugin you have downloaded/installed
- The version of LRM client that you are using
- If the “Connected” message is shown at the bottom left of the LRM client window when your aircraft is loaded in the simulator or not.
Well, that’s it, hopefully, this helped you guys out